Like I mentioned in the earlier post, I will be explaining each tool that is utilized in the DevSecOps pipeline. In this post, I will give an overview of the basic setup in the AWS environment.
Setup
The initial setup consists of 3 stages:
- Source
- Build
- Deploy
Source
For the sake of this blog, I will be using a sample application that I created on the fly as the source. The web application will have a frontend and a backend both in seperate repositories. I am using AWS CodeCommit as my source which contains both the frontend and the backend repositories. The frontend of the application is developed using React, a popular JavaScript library for building user interfaces. On the other hand, the backend is implemented in Node.js, a runtime environment well-suited for building scalable and efficient server-side applications.
Build
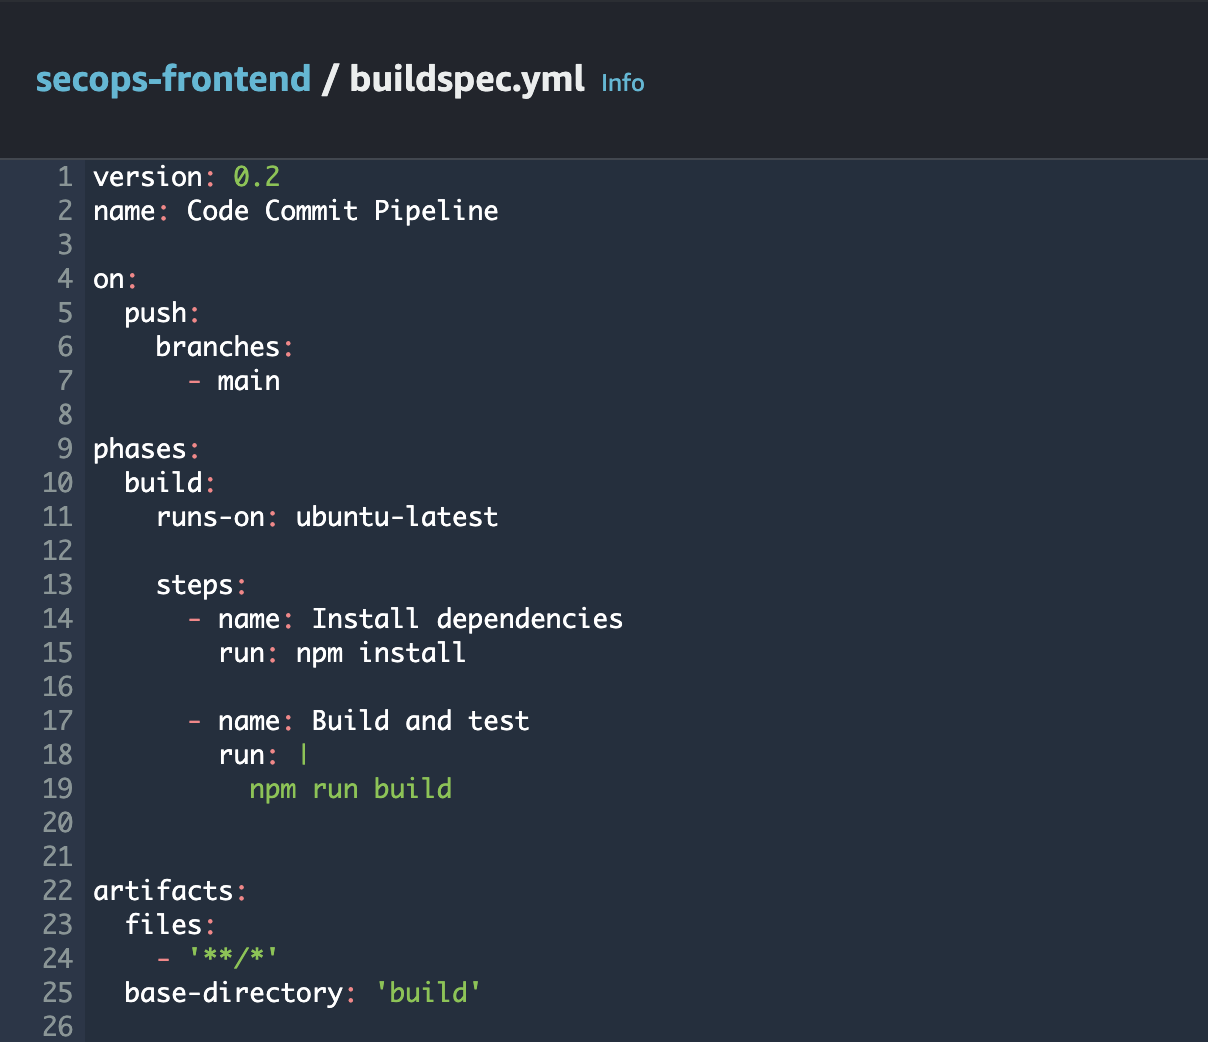
I have structured my development workflow with separate repositories for frontend and backend components. Leveraging AWS CodeBuild, I orchestrate the build process directly from these AWS CodeCommit repositories. Each repository has a dedicated buildspec.yml file, defining the commands necessary to compile and construct their respective projects. Below is the example of the buildspec.yml file that I used for frontend.
Deploy
For the frontend, we’re using the power of AWS S3, a highly scalable object storage service ideal for hosting static websites. By simply uploading our compiled React application to an S3 bucket, we can swiftly deploy and serve the frontend. On the backend part, we’re utilizing AWS CodeDeploy, a fully managed deployment service facilitating automated software deployments. With CodeDeploy, we can automate the deployment process of our Node.js backend on a EC2 instance. I am not going to explain in depth about the deployment process since this post is just a overview of the deployment.
Here is the initial setup in AWS of my frontend.

That’s all for this post. See you guys on the next one!!